🥜 The Ultimate No-Bake Peanut Butter Cream Pie (Foolproof Recipe!)
There are few dessert combinations in the culinary world that hold as much universal power as rich, velvety peanut butter combined with sweet, airy cream. If you are searching for the perfect, crowd-pleasing dessert that requires absolutely zero oven time, you have officially arrived at the holy grail.
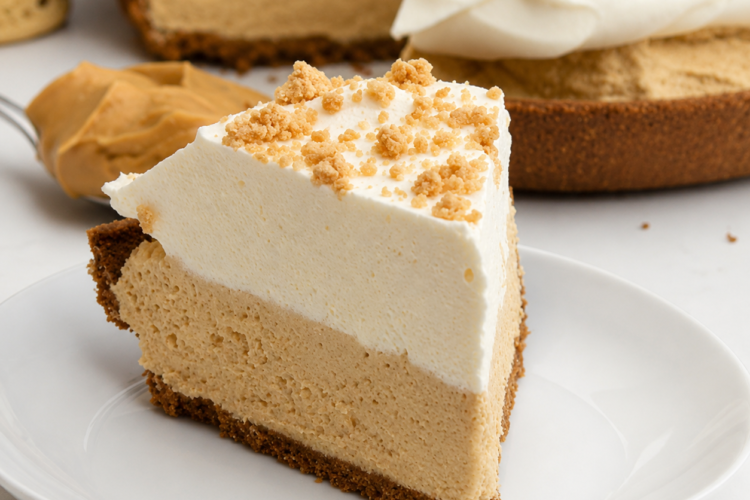
This Ultimate No-Bake Peanut Butter Cream Pie hits every single structural note an exceptional dessert should have. It is deeply decadent yet incredibly light; it boasts a rich, salty-sweet peanut flavor profile, and it rests beautifully inside a buttery, crisp graham cracker crust.
Best of all? This recipe requires less than twenty minutes of active preparation time. Whether you are hosting a summer backyard barbecue, preparing a holiday dessert spread, or simply trying to satisfy a sudden, intense late-night peanut butter craving, this comprehensive guide will teach you exactly how to execute a restaurant-quality pie right in your home kitchen.
🧐 Why This Specific Recipe Dominates Search and Taste Buds
When analyzing what makes a recipe go viral online and become a staple in family kitchens, it all comes down to texture balance and ingredient ratios. Many peanut butter pie recipes on the internet fall into two traps: they are either dense and heavy like a solid block of fudge, or they are too runny, causing the pie to collapse into a sad puddle the moment you cut the first slice.
This recipe uses a meticulously tested ratio of softened cream cheese to creamy commercial peanut butter, lightened gracefully by whipped topping. The result is an ultra-creamy, silk-like mousse consistency that holds its shape cleanly under a knife but melts like velvet on the tongue.
By utilizing a pre-baked or no-bake 9-inch graham cracker crust, we eliminate the risk of over-baking or shrinking crusts, making this an accessible victory for bakers of all skill levels.
🛒 The Exact Ingredient Breakdown You Need
Before you pull out your mixing bowls, let’s take a granular look at the seven simple ingredients required to make this masterpiece. Quality and temperature matter immensely here, so let’s discuss why each component works.
| Ingredient | Quantity | Purpose in the Recipe |
|---|---|---|
| 9-inch Graham Cracker Pie Crust | 1 Crust (Store-bought or Homemade) | Provides a crunchy, buttery, structural base that balances the ultra-soft filling. |
| Creamy Peanut Butter | 1 Cup | The star of the show. Provides the primary flavor, rich fats, and structure to the filling. |
| Cream Cheese | 8 oz (1 Block), fully softened | Adds a subtle, tangy undertone and acts as the structural anchor for the mousse texture. |
| Powdered Sugar | 1 Cup | Sweetens the pie filling while dissolving instantly to guarantee a lump-free texture. |
| Frozen Whipped Topping | 8 oz, completely thawed & divided | Split into two uses: lightens the interior peanut butter base and serves as the fluffy topping. |
| Powdered Sugar (For Topping) | 2 Tablespoons | Stabilizes and lightly sweetens the final decorative whipped layer. |
| Creamy Peanut Butter (For Drizzle) | 1 Tablespoon | Melted and used as an elegant aesthetic drizzle across the top of the finished pie. |
🧠 The Food Science: Why Temperature is Everything
Before starting, we must address the absolute number-one reason why no-bake pies fail: temperature mismatches.
Cream cheese is comprised of tight protein webs and milk fats. When it is cold from the refrigerator, these fats are highly structured and solid. If you attempt to beat cold cream cheese, it will break apart into hundreds of tiny, stubborn beads. No matter how long you blend it with the peanut butter later, those tiny lumps of cold cheese will remain, ruining the silky mouthfeel of your pie.
Pro-Tip for Fast Softening: If you forgot to pull your cream cheese block out of the fridge a few hours in advance, do not panic! Unbox the foil wrapper entirely, cut the cream cheese into 1-inch cubes, and place them on a microwave-safe plate. Microwave on 50% power in brief 10-second intervals for about 30 seconds total. It should feel completely yielding to the touch but not warm or melted.
Similarly, your frozen whipped topping must be thoroughly thawed in the refrigerator. Attempting to fold frozen or partially icy whipped topping into a room-temperature peanut butter mixture will shock the fats, cause immediate separation, and completely deflate the air pockets that give the pie its coveted mousse texture.
🥣 Step-by-Step Instructions: The Flawless Method
Follow these exact steps to ensure your peanut butter cream pie comes together flawlessly.
Step 1: Cream the Base Foundations
In a large mixing bowl (or the bowl of a stand mixer fitted with the paddle attachment), place your 8 ounces of fully softened cream cheese and 1 cup of creamy peanut butter. Beat on medium-high speed for a full 2 to 3 minutes. Stop the mixer halfway through to scrape down the sides and bottom of the bowl with a flexible rubber spatula. You are looking for a perfectly uniform, smooth, single-colored mixture completely devoid of streaks.
Step 2: Incorporate the Sweetener
Turn your mixer down to low speed. Slowly add the 1 cup of powdered sugar in small batches. If you dump the entire cup in at once and turn on the mixer, a massive cloud of sugar dust will coat your kitchen counters! Once the sugar is mostly incorporated, increase the speed to medium and beat for 1 additional minute until fluffier and slightly lightened in color.
Step 3: Fold in the Fluff
Remove the bowl from your mixer. Open your thawed 8-ounce container of whipped topping. Scoop exactly half of the container (approximately 4 ounces) into your peanut butter mixture.
Using a rubber spatula, employ the folding technique: cut down through the center of the mixture, sweep across the bottom of the bowl, and flip the mixture over on itself. Rotate the bowl 90 degrees and repeat. Never stir rapidly or beat the mixture at this stage, as doing so will crush the micro-air bubbles inside the whipped topping, turning your fluffy filling dense. Fold patiently until no white streaks remain.Step 4: Fill the Shell
Pour the luscious peanut butter filling into your prepared 9-inch graham cracker crust. Use an offset spatula or the back of a spoon to smoothly spread the filling evenly to the edges. Gently tap the pie pan flat on your countertop a few times to release any trapped pockets of air.
Step 5: Prepare and Apply the Topping
Take the remaining half of your thawed whipped topping left in the container. Gently fold in the remaining 2 tablespoons of powdered sugar—this provides a touch of extra stability and sweetness to the top layer. Spread this sweetened layer beautifully over the top of the peanut butter layer, creating elegant swirls and peaks with your spatula.
Step 6: The Art of the Decorative Drizzle
Take your final 1 tablespoon of creamy peanut butter and place it in a small, microwave-safe bowl. Microwave it on high for a brief 15 to 20 seconds until it turns fluid and runny.
Dip a fork or a small spoon into the warm peanut butter, hold it high over the pie, and swing your hand back and forth in a rapid zigzag pattern to create beautiful, thin, professional-looking artisanal lines across the white whipped surface.❄️ The Importance of the Cold Cure
As tempting as it is to plunge a fork straight into the pie bowl immediately after assembly, you must chill this pie. Because this is a no-bake recipe without gelatin or eggs, it relies entirely on temperature to set up structurally.
Place the pie completely uncovered into your refrigerator for a minimum of 4 hours, though 6 to 8 hours (or overnight) is highly recommended. The cold temperature allows the fats in the cream cheese and peanut butter to firm up, anchoring the whipped topping into a sliceable, stable matrix.
If you try to cut the pie too early, the center will slowly slump out onto the serving plate. A well-chilled pie will yield pristine, sharp triangles with distinct, beautiful layers.🛠️ Essential Kitchen Equipment Checklist
Having the right tools on hand makes the assembly process incredibly smooth and prevents unnecessary mess.
- Electric Mixer: A standard hand mixer or a classic stand mixer is absolutely essential for whipping the dense cream cheese and peanut butter into a smooth paste. Doing this by hand with a wooden spoon is incredibly difficult and often yields lumpy results.
- Rubber Silicone Spatula: The ultimate tool for scraping down the sides of your bowl ensuring no unmixed pockets of sugar remain, and for properly executing the delicate folding process.
- Offset Spatula: A metal spatula with a slight bend in the neck. It allows you to smooth out the filling inside the deep pie shell and create elegant waves in the whipped topping effortlessly.
- Microwave-Safe Small Bowls: Perfect for softening cream cheese or quickly melting your final peanut butter decorative drizzle.
🔄 Ingredient Substitutions and Variations
Baking is a science, but home cooking should be adaptable. Here is how you can modify this recipe to suit different dietary restrictions, ingredient availability, or taste preferences.
🥜 The Peanut Butter Dilemma: Can I Use Natural Peanut Butter?
This is the most frequent question asked about peanut butter desserts. It is highly recommended that you stick to traditional, conventional commercial peanut butters (such as Jif, Skippy, or store-brand equivalents).
Natural peanut butters—the types that contain only peanuts and salt, and require you to stir the separated oil back in—are highly unpredictable in baking. They tend to be much too fluid and lack the stabilizers needed to help a no-bake pie solidify. If you absolutely must use natural peanut butter, ensure it is thoroughly stirred, completely cold from the fridge, and recognize that your final pie filling may turn out significantly softer.🌾 Making it Gluten-Free
To make this dessert completely gluten-free, simply swap out the standard graham cracker crust for a certified gluten-free graham cracker crust. They are widely available in the baking aisles of most major supermarkets. Alternatively, you can crush your favorite gluten-free cookies and press them into a pie dish with a bit of melted butter.
🍫 The Chocolate Customization Twist
If you believe that peanut butter always tastes better when paired with chocolate, you can easily customize this recipe:
- Swap the standard graham cracker crust for a dark Oreo or chocolate cookie crumb crust.
- Fold a half cup of mini semi-sweet chocolate chips directly into the filling during Step 3.
- In addition to the melted peanut butter drizzle on top, melt 1 tablespoon of semi-sweet chocolate chips and cross-drizzle it over the pie for a beautiful, dual-colored pattern.
📊 Comprehensive Nutritional Analysis
Understanding the macronutrient breakdown is helpful for incorporating special treats into your lifestyle balance. Below is an approximate nutritional profile for one slice of pie, assuming the pie is cut cleanly into 8 generous, equal portions.
Nutritional Disclaimer: Individual values may vary slightly depending on the specific brands of graham cracker crust, cream cheese, and whipped topping chosen at your local grocery store.
Metric Amount Per Serving (1/8th of Pie) Calories ~480 kcal Total Fat 31g Saturated Fat 13g Cholesterol 30mg Sodium 340mg Total Carbohydrates 42g Dietary Fiber 2g Sugars 28g Protein 9g 🌡️ Storage, Freezing, and Make-Ahead Guidelines
This pie is an exceptional candidate for meal prep because it holds its structure incredibly well over time and actually tastes better after the flavors have spent hours marrying together in the cold.
Refrigerator Storage
Keep the pie covered loosely with plastic wrap or under an inverted pie carrier dome. Store it in the refrigerator for up to 5 days. Over time, the graham cracker crust will slowly absorb moisture from the filling and lose a bit of its crunch, but the flavor will remain phenomenal.
Freezing Method (The Ice Cream Pie Alternative)
If you want to prepare this pie weeks in advance, it freezes beautifully!
- Assemble the entire pie through the topping and drizzle stage.
- Place it uncovered in the freezer for 2 hours until the surface is completely hard.
- Wrap the frozen pie tightly in a double layer of plastic wrap, followed by a final layer of heavy-duty aluminum foil to completely protect it from freezer burn.
- Freeze for up to 3 months.
To Serve: You can either transfer the frozen pie to the refrigerator 4 hours before serving to allow it to thaw into a soft mousse, or cut it and eat it straight from the freezer for a sensational, frozen ice-cream-like peanut butter treat!🛑 Common Pitfalls and How to Avoid Them
Even with a simple no-bake recipe, small mistakes can impact your results. Review these common pitfalls to ensure your pie turns out absolutely flawless on the first try.
1. The Filling is Grainy
- The Cause: The powdered sugar was added to cold cream cheese, or coarse granulated sugar was substituted.
- The Fix: Always use fine powdered sugar (also known as confectioner’s sugar), which contains a touch of cornstarch to absorb moisture and dissolves effortlessly without heat. Ensure your cream cheese is completely softened to room temperature before mixing.
2. The Pie Crust Crumbles When Slicing
- The Cause: Slicing a cold crust with a dull, dry knife can cause the compact crumbs to shatter.
- The Fix: Run a sharp chef’s knife under hot tap water for 10 seconds, wipe it completely dry with a clean towel, and slice through the pie. The residual heat on the metal blade will cut through the butter fats in the crust like a warm laser, leaving clean edges. Wipe the blade clean and re-warm it between every single cut.
3. The Filling is Runny or Soupy
- The Cause: The whipped topping was over-mixed and deflated, or the pie has not spent enough time chilling in the refrigerator.
- The Fix: Remember to fold, not stir. If it’s already mixed and seems loose, put it into the freezer for 1 to 2 hours to help it stiffen up quickly before serving.
💬 Frequently Asked Questions (FAQ)
Can I use homemade whipped cream instead of whipped topping?
Yes, you can swap the 8 oz of whipped topping for an equal volume of homemade stabilized whipped cream. To do this, whip 1.5 cups of heavy whipping cream with 1/4 cup of powdered sugar until very stiff peaks form. Be aware that real whipped cream deflates much faster than commercial whipped topping, so the pie should ideally be consumed within 48 hours of assembly.
Can I make this a deep-dish pie?
This specific ratio of ingredients perfectly fills a standard 9-inch pie pan (about 4 cups of volume). If you try to use a deep-dish 9-inch or 10-inch crust, the filling might look a little shallow. If you only have a deep-dish crust on hand, increase the ingredients by 25% to fill it all the way to the top rim.
What can I use as additional garnishes?
To make this pie look like it stepped out of an upscale bakery showcase, try adding crushed honey-roasted peanuts around the border for a crunchy texture contrast, shaving a bar of dark chocolate over the center, or putting a few miniature peanut butter cups right into the whipped peaks.
🍽️ The Verdict: Your New Go-To Dessert
No-bake desserts are the ultimate secret weapon for busy home cooks, hosts, and anyone looking to minimize kitchen heat. This Peanut Butter Cream Pie proves that you don’t need hours of complex baking techniques, expensive ingredients, or advanced culinary degrees to create something utterly unforgettable.
By prioritizing correct ingredient temperatures, respecting the delicate folding process, and allowing the refrigerator to work its setting magic, you will serve a pristine dessert that balances rich, salty nuttiness with airy, cloud-like sweetness. Print this recipe, stock up your pantry, and get ready to earn rave reviews from everyone lucky enough to score a slice!