🍰 The Ultimate JFK Wedding Cake Recipe: Bake Like White House Royalty
When Jacqueline Bouvier married Senator John F. Kennedy on September 12, 1953, in Newport, Rhode Island, the event was instantly dubbed the “wedding of the century.” Every single detail was meticulously scrutinized, from Jackie’s iconic portrait-neckline gown to the massive, multi-tiered dessert that took center stage at the reception.
For decades, bakers, history buffs, and vintage cake enthusiasts have tried to recreate the magic of JFK’s wedding cake.
If you are looking to bring a taste of Camelot into your own kitchen, you are in the right place. This ultimate guide breaks down the history, the exact recipe, and the pro-baking techniques needed to recreate this legendary dessert. Best of all, we have scaled it down from a massive multi-tiered masterpiece meant for 1,200 wedding guests into a foolproof, show-stopping layer cake you can easily bake at home.
📜 The Fascinating History of the Kennedy Wedding Cake
To truly appreciate this cake, you have to understand the sheer scale of the event where it was served. The wedding took place at St. Mary’s Church, followed by an outdoor reception at Hammersmith Farm—the childhood home of the bride.
Date: September 12, 1953
Location: Hammersmith Farm, Newport, RI
Guest Count: ~1,200 attendees
The Baker: Plourde's Bakery, Fall River, MA
The original cake was an absolute behemoth. Standing at over four feet tall and featuring five magnificent tiers, it was created by Plourde’s Bakery in Fall River, Massachusetts. It required hours of intricate piping, delicate columns, and an incredible amount of premium ingredients to feed the high-society crowd, which included senators, movie stars, and diplomats.
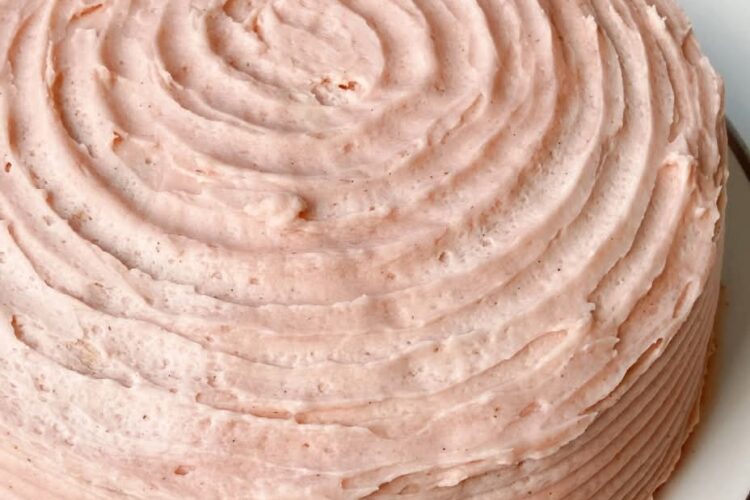
While the original towering structure featured complex royal icing work and dozens of hidden internal supports, the heart of the cake was surprisingly classic: a rich, tender, velvet-textured yellow sponge cake layered with a vibrant, tart fruit filling and wrapped in a luscious, flecked vanilla bean buttercream.
🛒 The Complete Ingredient Checklist
Before you preheat your oven, you need to gather your ingredients. Because this recipe relies on traditional mid-century baking ratios, using high-quality components will yield the best results.
🥣 For the Cake Layers
- 1 1/2 sticks (3/4 cup) salted butter, softened: Unlike modern recipes that rely heavily on unsalted butter and added salt, this vintage-style recipe uses salted butter to create a deeply savory, rich backbone that balances the sweet sugar.
- 1 1/2 cups granulated sugar: Provides sweetness and helps lock in moisture by binding with water molecules during the baking process.
- 1 teaspoon pure vanilla extract: Use a high-quality extract; avoid artificial vanilla flavorings.
- 5 large eggs: Brought completely to room temperature. This is a high-egg ratio cake, which gives the crumb its signature golden color and structurally sound texture.
- 1 3/4 cups all-purpose flour: Gives the cake its tight, tender, traditional crumb texture.
- 1 teaspoon baking powder: The primary chemical leavening agent that ensures a clean, even rise.
- 1 tablespoon whole milk: Just a touch of extra hydration to smooth out the batter right before it hits the pans.
🍦 For the Frosting and Assembly
- 1 1/2 cups unsalted butter, softened: Using unsalted butter for the frosting allows you to meticulously control the saltiness of your final decorative coat.
- 4 cups powdered sugar (confectioners’ sugar): Sifted carefully to eliminate any stubborn lumps.
- 2 teaspoons pure vanilla extract: Amplifies the warm background notes of the buttercream.
- 2 tablespoons heavy whipping cream: Adds a silky, light, easily spreadable texture to the frosting.
- 1/4 teaspoon salt: Cuts through the intense sweetness of the sugar.
- Seeds from 1 whole vanilla bean pod: The ultimate secret weapon. The tiny black flecks scream luxury and mimic the high-end artisan style of the original 1953 masterpiece.
- 1 jar (12 oz) seedless raspberry preserves: The traditional filling. The sharp tartness of raspberries beautifully cuts through the rich, buttery cake layers and sweet icing.
⚖️ The Critical Science of Ingredient Temperature
If there is one thing that ruins scratch-baked cakes more than anything else, it is using ingredients straight from the refrigerator.
The Golden Rule of Baking: Cold ingredients do not emulsify. Room temperature ingredients do.
When a recipe asks for softened butter and room-temperature eggs, it isn’t a casual suggestion—it is a strict scientific requirement. Baking is an intricate series of chemical reactions. When you cream room-temperature butter and sugar together, the sharp sugar crystals cut tiny pockets of air into the fat. If your eggs are cold when you add them to that creamed mixture, they will instantly chill the butter, causing the fat to seize, curdle, and break the emulsion.
To ensure success, set your butter, eggs, and milk out on the counter for at least 60 to 90 minutes before you intend to mix your batter.👩🍳 Step-by-Step Instructions: Baking the Cake Layers
Let’s walk through the baking process step-by-step to guarantee a flawless, level rise and a melt-in-your-mouth crumb structure.
- Prep Your Kitchen & Equipment
10 minutes
Preheat your oven to 350°F (175°C). Lightly grease two 8-inch round cake pans with butter or non-stick baking spray. Line the bottoms of the pans with circles of parchment paper, then grease the top of the parchment. Dust lightly with flour, shaking out any excess.- Cream the Butter and Sugar
5-7 minutes
In the bowl of a stand mixer fitted with the paddle attachment (or using a large bowl with a hand mixer), place your 1 1/2 sticks of softened salted butter and 1 1/2 cups of granulated sugar. Beat on medium-high speed for a full 5 to 7 minutes until the mixture turns pale white and looks incredibly fluffy. Add the 1 teaspoon of vanilla extract halfway through.- Incorporate the Eggs Individually
4 minutes
Turn the mixer down to medium-low speed. Add your room-temperature eggs one at a time, allowing each egg to fully disappear into the batter before adding the next one. Scrape down the sides and bottom of the bowl with a rubber spatula frequently to ensure an even mix.- Sift and Combine Dry Ingredients
3 minutes
In a separate medium bowl, whisk together the 1 3/4 cups of all-purpose flour and 1 teaspoon of baking powder. Sifting them ensures no clumps of baking powder are left behind, preventing uneven pockets of rising.- Alternating Addition Technique
3 minutes
With the mixer running on its lowest speed setting, add roughly one-third of your flour mixture to the wet ingredients. Mix just until combined. Add the 1 tablespoon of whole milk, then follow with the remaining flour. Stop mixing the absolute second the last streak of flour disappears. Over-mixing develops gluten, turning your delicate cake tough and bread-like.- Bake and Cool Thoroughly
25-30 minutes
Divide the batter perfectly evenly between your two prepared 8-inch pans. Smooth the tops with an offset spatula. Bake on the middle rack of your oven for 25 to 30 minutes, or until a wooden toothpick inserted into the dead center comes out clean or with a few moist crumbs. Let the cakes cool in their pans for 10 minutes before carefully inverting them onto a wire cooling rack to cool completely to room temperature.🧁 Crafting the Royal Vanilla Bean Buttercream
While your cake layers are cooling, it is time to prepare the frosting. This is an American buttercream, but the addition of heavy cream and fresh vanilla bean seeds gives it an ultra-luxurious, velvety texture worthy of a White House affair.
🔪 How to Extract Vanilla Bean Seeds
To get the most out of your fresh vanilla bean pod, lay it flat on a cutting board. Use the tip of a sharp paring knife to slice the pod lengthwise from top to bottom, cutting through the top layer of skin but not all the way through the back. Gently pull the pod open like a book. Using the flat, unsharpened back edge of your knife blade, scrape down the inside of the pod from top to bottom. You will gather a thick, sticky paste comprised of thousands of intensely aromatic black seeds.
🥣 Mixing the Frosting
- Whip the Butter: Place your 1 1/2 cups of unsalted butter into a clean mixer bowl. Whip on medium-high speed for 3 to 4 minutes until it becomes ultra-smooth and visibly lighter in color.
- Slowly Introduce Sugar: Turn the mixer down to low. Add the 4 cups of sifted powdered sugar one cup at a time, letting it fully incorporate so you don’t get trapped in a massive cloud of sugar dust.
- Add Aromatics and Liquids: Pour in the 2 teaspoons of vanilla extract, the 1/4 teaspoon of salt, and the fresh vanilla bean seeds.
- Emulsify with Cream: Turn the mixer back up to medium-high and drizzle in the 2 tablespoons of heavy whipping cream. Beat the frosting for an additional 2 to 3 minutes. It should become light, incredibly fluffy, and easily spreadable.
🏗️ Master Class: Assembly and Stacking
Stacking a cake with a fruit jam filling can be notoriously tricky. If you simply smear jam between layers and throw the top cake on, the weight will cause the slippery jam to ooze out of the sides, completely ruining your exterior buttercream design.
To prevent this disaster, use the professional “Buttercream Dam” technique.
[ Top Cake Layer ]
==================================
[ Buttercream Dam Ring ] -> (Contains 12oz Raspberry Preserves)
==================================
[ Bottom Cake Layer ]
🧱 Stacking Your Cake Like a Pro
- Level the Layers: Use a long serrated bread knife to slice off any domed tops from your cooled cake layers so they are perfectly flat.
- Anchor the Base: Smear a tiny dollop of buttercream onto the center of your serving plate or cake cardboard to act as a glue, then place your first cake layer down.
- The Dam: Fill a pastry bag fitted with a simple round piping tip (or a zip-top bag with the corner snipped off) with a cup of your vanilla buttercream. Pipe a thick, 1/2-inch tall border ring directly around the top perimeter edge of the bottom cake layer.
- The Filling: Spoon the 12 ounces of seedless raspberry preserves directly into the center of that ring, smoothing it out evenly. The piped ring of buttercream acts as a structural wall, trapping the jam inside.
- Add the Top Layer: Place your second cake layer directly on top, cut-side down (this guarantees a perfectly flat, crumb-free top surface). Press down very gently to set it in place.
🎨 Professional Decorating Tips: The Crumb Coat
Before you apply your beautiful final layers of flecked vanilla bean buttercream, you must apply a crumb coat. This is a very thin, translucent layer of frosting applied over the entire exterior of the cake that acts as an adhesive, locking down any loose cake crumbs.
Spread a thin layer of buttercream over the top and sides of the cake using an offset spatula. Scrape off any excess frosting so the cake layers peek through. Place the cake into your refrigerator for 20 to 30 minutes until this layer is completely firm to the touch. Once chilled, you can apply the remaining buttercream without worrying about unsightly yellow crumbs ruining your gorgeous white frosting.
📋 Comprehensive Baking Troubleshooting Guide
Even experienced bakers run into issues sometimes. If your cake isn’t turning out exactly like the photos, refer to this quick reference table to diagnose and fix the problem.
| Symptom | Probable Cause | Expert Solution |
|---|---|---|
| Cake sank in the dead center | Oven door opened too early, or expired baking powder. | Keep the oven door shut until at least 20 minutes have passed. Always check the expiration date on your leavening agents. |
| Crumb is dense and heavy | Over-mixing the batter after adding flour, or cold ingredients. | Mix strictly until the flour streaks disappear. Ensure all ingredients are at true room temperature before mixing. |
| Frosting is too runny/soft | The kitchen is too hot, or too much heavy cream was added. | Chill the frosting in the fridge for 15 minutes, then re-whip. Add 2-3 tablespoons of extra powdered sugar if needed. |
| Frosting is full of air pockets | Buttercream was whipped too fast or too long at the end. | Use a wooden spoon or a rubber spatula to vigorously beat the frosting by hand for 60 seconds to smash the air bubbles out. |
🍽️ Slicing, Serving, and Storage Instructions
To get clean, professional restaurant-quality slices of your JFK wedding cake, dip a long, sharp chef’s knife into a tall glass of hot water, wipe it clean with a towel, and slice through the cake while it is still slightly chilled. Repeat the hot water dip between every single cut.
🥡 Storage Guidelines
- Room Temperature: Because the high amount of sugar acts as a natural preservative, this cake can sit under a glass cake dome at room temperature for up to 3 days.
- Refrigeration: If your kitchen is warm or humid, wrap the cake gently in plastic wrap and store it in the fridge for up to 5 days. Always let slices sit on the counter for 20 minutes before serving so the butter components soften back up to their proper textures.
- Freezing: You can freeze fully assembled cakes or individual slices! Wrap them tightly in a double layer of plastic wrap followed by aluminum foil. They will stay fresh in the freezer for up to 3 months. Thaw overnight in the refrigerator before bringing to room temperature.