🍋 Italian Easter Cookies (Soft, Glazed & Irresistible!)
Italian Easter Cookies are a timeless spring dessert that perfectly captures the joy of the season. Soft, pillowy, lightly sweet, and topped with a bright lemon glaze, these cookies are a staple on Easter tables across Italy and Italian-American homes. Whether you know them as Anginetti, Taralli Dolci, or simply Easter cookies, one thing is certain—they’re impossible to resist!
In this ultimate guide, you’ll learn how to make the BEST Italian Easter Cookies from scratch, along with expert baking tips, variations, storage advice, and everything you need to rank your recipe at the top of Google 🍪✨
🌸 What Are Italian Easter Cookies?
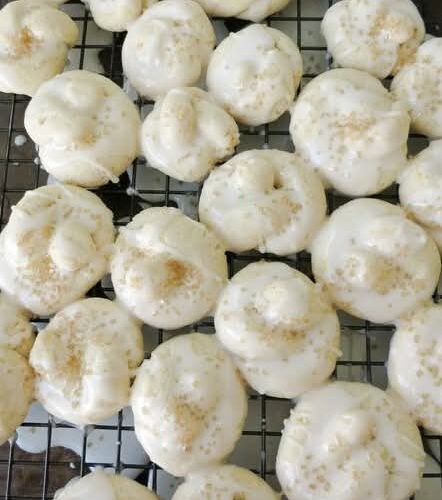
Italian Easter Cookies are soft, cake-like cookies traditionally flavored with lemon and vanilla, then topped with a sweet glaze and festive sprinkles. Unlike crispy cookies, these have a tender crumb—almost like a mini muffin in cookie form.
They’re especially popular during Easter celebrations because:
- 🍋 Lemon symbolizes freshness and spring
- 🎉 Sprinkles add festive color
- 👩🍳 They’re easy to make in large batches for family gatherings
🛒 Ingredients You’ll Need
🍪 For the Cookies:
- 2 cups all-purpose flour (plus more for dusting)
- 3 tablespoons cornstarch
- 1 ½ teaspoons baking powder
- ½ teaspoon salt
- ¼ teaspoon baking soda
- 1 stick unsalted butter, room temperature
- ½ cup granulated sugar
- 1 egg, room temperature
- 1 tablespoon pure vanilla extract
- 1 teaspoon lemon extract
- Zest of 1 lemon
🍋 For the Glaze:
- 1 ¾ cups confectioners sugar
- Juice of 1 lemon
- Pinch of salt
✨ Optional Decorations:
- Colorful sprinkles
- Extra lemon zest
- Turbinado sugar
👩🍳 How to Make Italian Easter Cookies (Step-by-Step)
🥣 Step 1: Prepare the Dry Ingredients
In a medium bowl, whisk together:
- Flour
- Cornstarch
- Baking powder
- Baking soda
- Salt
Set aside. The cornstarch is key here—it gives the cookies that soft, tender texture!
🧈 Step 2: Cream Butter and Sugar
In a large mixing bowl:
- Beat the butter and sugar until light and fluffy (about 2–3 minutes)
This step helps create soft, airy cookies—don’t rush it!
🥚 Step 3: Add Wet Ingredients
Mix in:
- Egg
- Vanilla extract
- Lemon extract
- Lemon zest
Beat until fully combined and smooth.
🍪 Step 4: Combine Wet and Dry
Gradually add the dry ingredients into the wet mixture:
- Mix until a soft dough forms
- Avoid overmixing to keep cookies tender
If the dough is slightly sticky, that’s perfect!
✋ Step 5: Shape the Cookies
- Lightly flour your hands
- Roll dough into 1-inch balls
- Place on a lined baking sheet
- Leave space between each cookie
Optional: Shape into rings or twists for a traditional look.
🔥 Step 6: Bake
- Preheat oven to 350°F (175°C)
- Bake for 10–12 minutes
Cookies should be:
- Pale on top
- Lightly golden on the bottom
Do NOT overbake—these are meant to stay soft!
❄️ Step 7: Cool Completely
Let cookies cool on a wire rack before glazing.
🍋 Step 8: Make the Glaze
In a bowl:
- Whisk powdered sugar, lemon juice, and salt
- Adjust consistency:
- Thicker = less juice
- Thinner = more juice
✨ Step 9: Glaze and Decorate
- Dip tops of cookies into glaze
- Add sprinkles immediately
- Let set for 20–30 minutes
Now they’re bakery-perfect!
💡 Pro Tips for Perfect Cookies
✔️ Use Room Temperature Ingredients
This ensures smooth mixing and better texture.
✔️ Don’t Overbake
These cookies should stay soft and fluffy—not browned.
✔️ Chill If Needed
If dough is too sticky, chill for 20 minutes.
✔️ Double the Batch
These disappear FAST—trust me!
🍋 Flavor Variations You’ll Love
Want to customize your cookies? Try these delicious twists:
🍊 Orange Italian Cookies
Swap lemon juice and zest for orange.
🌿 Almond Flavor
Replace lemon extract with almond extract for a nutty touch.
🌈 Festive Colors
Add pastel food coloring to glaze for Easter vibes.
🍫 Chocolate Drizzle
Drizzle melted chocolate over glazed cookies for a rich finish.
🎉 Why These Cookies Are Perfect for Easter
Italian Easter Cookies are more than just dessert—they’re a tradition.
They’re:
- Easy to share
- Kid-friendly to decorate
- Light and refreshing after a big meal
- Beautiful on dessert tables
Their bright lemon flavor pairs perfectly with springtime celebrations 🌼
🧊 How to Store Italian Easter Cookies
🏠 At Room Temperature:
- Store in an airtight container
- Lasts up to 5 days
❄️ In the Refrigerator:
- Keeps for up to 1 week
- Bring to room temp before serving
🧊 Freezing:
- Freeze unglazed cookies up to 2 months
- Thaw and glaze fresh
❓ Frequently Asked Questions
🤔 Why are my cookies dry?
You may have:
- Overbaked them
- Added too much flour
Always measure carefully!
🤔 Can I make them ahead?
Yes! Bake 1–2 days in advance and glaze before serving.
🤔 Can I skip the lemon?
Absolutely. Try vanilla, almond, or anise flavor instead.
🤔 Why use cornstarch?
It softens the texture, making cookies light and tender.
🍪 Serving Ideas
Make your cookies stand out with these serving tips:
- Arrange on a pastel dessert platter 🌸
- Pair with tea or coffee ☕
- Gift in decorative Easter boxes 🎁
- Serve alongside fruit and whipped cream
🧡 Final Thoughts
Italian Easter Cookies are the kind of recipe that brings people together. Simple ingredients, easy steps, and a burst of fresh lemon flavor make them a must-have every spring.
Whether you’re baking for family, friends, or just yourself, these cookies deliver soft, sweet perfection every single time.
So grab your mixing bowl, turn on your oven, and bring a little Italian tradition into your kitchen this Easter 🇮🇹✨