🍯 Caramelitas: The Ultimate Gooey Caramel Oatmeal Chocolate Bars Recipe
If you love desserts that combine buttery oats, rich caramel, and melted chocolate, then Caramelitas are about to become your new obsession. These decadent dessert bars are soft, chewy, gooey in the center, and perfectly crisp on the edges. Every bite delivers layers of flavor that feel comforting and indulgent at the same time.
Caramelitas are perfect for bake sales, family gatherings, holidays, or simply when you need a homemade treat to brighten your day. Even better, they’re surprisingly easy to make, using simple pantry ingredients and minimal prep time.
In this complete guide, you’ll learn how to make perfect Caramelitas, tips for getting the gooey center just right, common mistakes to avoid, variations, storage tips, and serving ideas so your bars turn out bakery-quality every time.
Let’s dive into caramel heaven.
🧈 What Are Caramelitas?
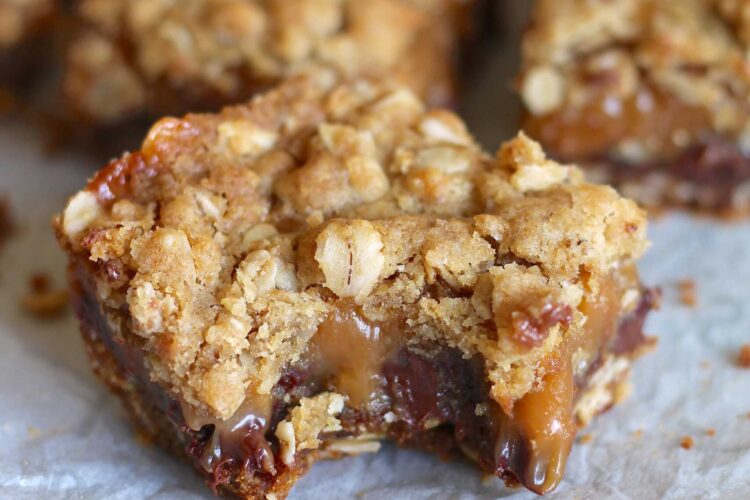
Caramelitas are layered dessert bars made with:
• A buttery oatmeal cookie crust
• Gooey caramel sauce
• Melting chocolate chips
• A crumbly oat topping
Unlike traditional brownies or cookie bars, Caramelitas stand out because of their soft caramel layer hidden between oat layers. When baked, the caramel melts into a smooth, chewy filling that pairs perfectly with chocolate.
They’re like a cross between an oatmeal cookie, a chocolate bar, and a caramel dessert — all in one bite.
📝 Ingredients You’ll Need
Here are the ingredients required to make classic Caramelitas:
Base & Crumble Layer
- ¾ cup butter, melted
- 1 cup all-purpose flour
- 1 cup old-fashioned oats
- ¾ cup brown sugar
- 1 teaspoon baking soda
Caramel Filling
- 11 oz bag baking caramels
- ½ cup heavy cream
Chocolate Layer
- 1 cup chocolate chips
Simple ingredients, but the flavor payoff is huge.
🍳 Step-by-Step Instructions
Follow these steps carefully for perfect Caramelitas.
Step 1: Prepare Your Baking Dish
Preheat your oven to 350°F (175°C).
Line an 8×8 or 9×9 baking pan with parchment paper, leaving overhang on the sides for easy removal later. Lightly grease if needed.
Step 2: Make the Oat Crust
In a mixing bowl, combine:
• Melted butter
• Flour
• Oats
• Brown sugar
• Baking soda
Mix until crumbly and evenly combined.
Step 3: Form the Bottom Layer
Press half of the oat mixture firmly into the prepared pan to form a crust.
Bake for 10 minutes, then remove from oven and set aside.
Step 4: Melt the Caramel
In a saucepan over low heat, combine:
• Baking caramels
• Heavy cream
Stir constantly until smooth and fully melted. Remove from heat once silky.
Step 5: Add Chocolate Layer
Sprinkle chocolate chips evenly over the warm crust.
Pour melted caramel evenly over the chocolate.
Step 6: Add Crumble Topping
Crumble remaining oat mixture over the caramel layer. Don’t press it down — leave it loose for texture.
Step 7: Bake Again
Return pan to oven and bake 15–18 minutes, until the top is lightly golden.
Step 8: Cool Completely
This is crucial. Allow bars to cool fully before cutting so caramel sets properly.
For best results, refrigerate for 1–2 hours before slicing.
🔥 Tips for Perfect Caramelitas Every Time
A few professional tips make a big difference.
✔ Use old-fashioned oats, not quick oats, for better texture.
✔ Don’t overbake — caramel should stay soft.
✔ Let bars cool fully or they’ll fall apart when cut.
✔ Line your pan for easy removal.
✔ Use good-quality chocolate for richer flavor.
Patience during cooling is the secret to clean, bakery-style slices.
❌ Common Mistakes to Avoid
Even simple recipes have pitfalls.
Overcooking caramel – It becomes hard instead of gooey.
Skipping parchment paper – Bars stick to pan.
Using low-fat substitutes – Texture suffers.
Cutting bars too soon – Filling spills out.
Taking your time makes all the difference.
🍫 Flavor Variations to Try
Once you master classic Caramelitas, try fun twists.
Nutty Caramelitas
Add chopped pecans or walnuts for crunch.
Salted Caramel Version
Sprinkle flaky sea salt on top before baking.
Peanut Butter Twist
Add peanut butter chips or swirl peanut butter into caramel.
Dark Chocolate Upgrade
Swap milk chocolate chips for dark chocolate for deeper flavor.
Coconut Lovers Version
Add shredded coconut to oat mixture.
These variations keep the recipe exciting every time.
🧊 How to Store Caramelitas
Caramelitas store beautifully.
Room temperature: Store in airtight container for 2–3 days.
Refrigerator: Keeps fresh for up to 1 week.
Freezer: Wrap bars individually and freeze for up to 3 months.
To serve, thaw and warm slightly for gooey texture.
🍨 Serving Suggestions
Caramelitas are delicious on their own, but you can elevate them further.
Serve warm with vanilla ice cream.
Drizzle with extra caramel sauce.
Add whipped cream and chocolate drizzle.
Pair with coffee or hot chocolate.
Warm bars + cold ice cream = unbeatable dessert combo.
🎉 Perfect Occasions for Caramelitas
These bars are always a crowd favorite.
• Holiday dessert tables
• Potluck gatherings
• Birthday parties
• Bake sales
• Movie nights
• Family weekends
They’re easy to transport and always disappear fast.
🥄 Why Everyone Loves Caramelitas
Caramelitas have everything people crave:
• Soft cookie texture
• Gooey caramel center
• Melted chocolate
• Slight crunch from oats
• Comforting homemade flavor
They feel nostalgic yet indulgent, simple yet impressive.
Plus, they taste even better the next day.
👩🍳 Make-Ahead & Meal Prep Friendly
You can prepare parts of this recipe in advance.
• Make oat mixture a day ahead.
• Melt caramel just before assembly.
• Bake bars the night before serving.
They hold up wonderfully, making party prep easier.
🌟 Final Thoughts: Your New Favorite Dessert Bar
Caramelitas are one of those desserts that people request again and again. They look impressive, taste incredible, and come together with everyday ingredients.
Once you try them, you’ll understand why they’re so popular: warm caramel, rich chocolate, and buttery oats create the ultimate comfort dessert.
Bake a batch, share with friends, or keep them all for yourself — no judgment here.
One thing is guaranteed: these bars will not last long.