🫓 Canadian Bannock Bread – The Ultimate Guide to Perfect Golden Fry Bread at Home
Few breads are as simple, historic, and satisfying as Canadian Bannock Bread. Crisp on the outside, soft and fluffy inside, and made from just a handful of pantry staples, bannock is one of the most beloved traditional quick breads across Canada. Whether fried until golden or baked over a fire, bannock has deep cultural roots and modern comfort appeal.
If you’ve never made bannock before, you’re about to discover one of the easiest and most rewarding bread recipes you can cook at home. No yeast. No rising time. No complicated steps. Just mix, shape, and cook.
This complete, SEO-optimized guide will show you exactly how to make perfect Canadian Bannock Bread, including expert tips, variations, serving ideas, history, and common mistakes to avoid — everything needed for a high-ranking, high-value recipe post.
🇨🇦 What Is Canadian Bannock Bread?
Bannock is a quick bread traditionally associated with Indigenous communities across Canada and Scotland. It was adopted and adapted over generations because it requires minimal ingredients, basic tools, and fast cooking time.
Unlike yeast bread, bannock uses baking powder as a leavening agent, making it ideal when you want fresh bread quickly. It can be:
- Pan-fried
- Deep-fried
- Baked
- Cooked over an open fire
- Wrapped around a stick and roasted
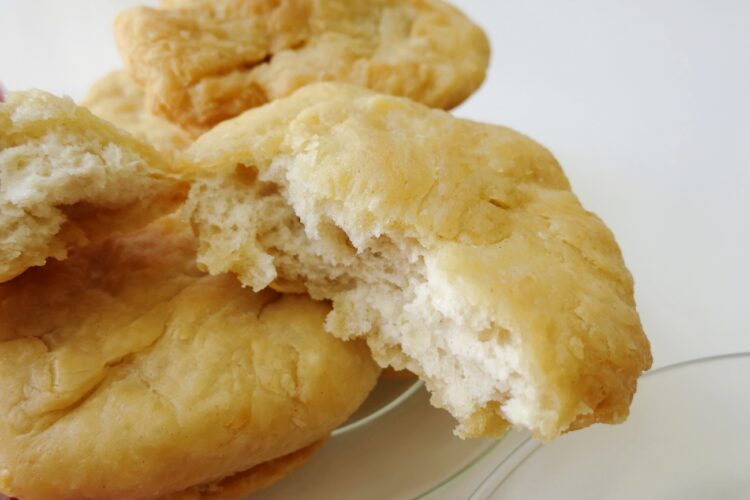
The fried version is especially popular today — golden, puffy, and slightly chewy with a crisp exterior.
⭐ Why This Bannock Recipe Works Perfectly
This version is designed for consistent, fluffy results with a beautiful golden crust. It’s beginner-friendly and tested for home kitchens.
What makes it reliable:
- Balanced flour-to-water ratio
- Proper baking powder lift
- Melted butter for tenderness
- Controlled frying temperature
- Clear shaping method
- Short cooking time
It’s the kind of bread recipe you can memorize and make anytime.
🛒 Bannock Bread Ingredients
Simple pantry ingredients — nothing fancy required.
- 2 cups all-purpose flour (plus extra for dusting)
- 2 teaspoons baking powder
- 1/2 teaspoon salt
- 1 tablespoon unsalted butter, melted
- 3/4 cup water
- 4 cups vegetable oil for frying
That’s it — five core ingredients for one of the most versatile breads you’ll ever make.
🧾 Ingredient Role Breakdown
Understanding the purpose of each ingredient helps guarantee success.
All-purpose flour – Provides structure and chew
Baking powder – Creates lift and lightness
Salt – Enhances flavor
Melted butter – Adds softness and richness
Water – Brings dough together
Vegetable oil – Ensures even frying and crisp crust
Because the ingredient list is short, quality and measurements matter.
🥣 Step-by-Step Canadian Bannock Bread Instructions
Follow these steps carefully for bakery-quality results.
🔪 Step 1: Mix Dry Ingredients
In a medium bowl, whisk together flour, baking powder, and salt until evenly combined.
🧈 Step 2: Add Wet Ingredients
Pour in melted butter and water. Stir until a soft dough forms. It should be slightly tacky but not sticky.
✋ Step 3: Knead Briefly
Turn dough onto a lightly floured surface. Knead gently for about 30–45 seconds — just enough to bring it together smoothly. Do not overwork.
🔵 Step 4: Shape the Dough
Flatten dough into a disk about ¾ inch thick. Cut into wedges or rounds depending on your preference.
🔥 Step 5: Heat the Oil
Pour vegetable oil into a deep skillet or pot. Heat to medium (about 350°F / 175°C). Oil should shimmer but not smoke.
🍳 Step 6: Fry the Bannock
Carefully place dough pieces into hot oil. Fry 2–3 minutes per side until golden brown and puffed.
🧻 Step 7: Drain and Serve
Remove and place on paper towels. Serve warm.
👨🍳 Pro Tips for Perfect Bannock Texture
✅ Don’t Overmix
Overworking the dough makes bannock tough. Mix just until combined.
✅ Test Oil Temperature
Drop a tiny dough piece in — if it sizzles gently, oil is ready.
✅ Keep Thickness Even
Uneven thickness causes uneven cooking.
✅ Fry in Small Batches
Avoid crowding the pan — it lowers oil temperature.
✅ Serve Warm
Bannock tastes best fresh and hot.
🏕️ Traditional Bannock Cooking Methods
Bannock isn’t just fried — historically, it was cooked many ways.
🔥 Campfire Bannock
Dough wrapped around a stick and roasted over fire.
🪵 Stone Bannock
Cooked on heated stones near flames.
🧱 Griddle Bannock
Cooked flat on cast iron.
🧺 Oven-Baked Bannock
Baked at 400°F for 18–22 minutes.
Each method produces slightly different texture and flavor.
🧁 Sweet Bannock Variations
Bannock easily transforms into dessert-style bread.
Add to dough:
- 2 tablespoons sugar
- Cinnamon
- Raisins
- Dried cranberries
- Chocolate chips
- Maple sugar
Top with:
- Honey
- Jam
- Powdered sugar
- Maple syrup drizzle
🧀 Savory Bannock Variations
Make bannock more meal-ready with savory mix-ins.
Add:
- Shredded cheese
- Chopped herbs
- Garlic powder
- Cooked bacon bits
- Green onions
- Jalapeños
Savory bannock pairs beautifully with soups and stews.
🍲 What to Serve with Bannock Bread
Bannock is extremely versatile.
Best pairings include:
- Hearty soups
- Chili
- Stews
- Smoked salmon
- Butter and jam
- Maple syrup
- Honey butter
- Fried eggs
- Pulled meat
It works as both a side and a base for toppings.
🧊 Storage and Reheating Guide
🧺 Room Temperature
Store covered up to 2 days.
❄️ Freezing
Freeze cooked bannock up to 2 months.
🔥 Reheating
Warm in oven at 350°F for 6–8 minutes or toast lightly.
Avoid microwaving — it softens the crust too much.
🧠 Bannock Bread History & Cultural Significance
Bannock has a long and meaningful history across Canada. Indigenous communities adapted bannock using available ingredients introduced through trade. Over time, it became a staple survival bread because it required:
- No yeast
- No special equipment
- Quick cooking
- Portable ingredients
Today, bannock remains both a cultural food and a comfort favorite across households, festivals, and outdoor cooking traditions.
⚖️ Fried vs Baked Bannock — Which Is Better?
🍳 Fried Bannock
- Crisp outside
- Soft inside
- Rich flavor
- Faster cooking
- More indulgent
🔥 Baked Bannock
- Lighter texture
- Less oil
- More bread-like crumb
- Better for sandwiches
Both are excellent — choose based on preference.
❌ Common Bannock Mistakes to Avoid
🚫 Too Much Flour
Dry dough = dense bannock.
🚫 Overkneading
Creates toughness.
🚫 Oil Too Hot
Burns outside, raw inside.
🚫 Oil Too Cool
Greasy texture.
🚫 Thick Dough
Leads to undercooked centers.
🔬 Texture Science — Why Bannock Gets Fluffy
Baking powder creates gas bubbles when heated. Those bubbles expand rapidly in hot oil, puffing the dough. Steam from water also contributes to lift. The result is that signature puffy interior with a crisp shell.
Proper oil heat is what locks in that structure.
🏆 Why This Recipe Beats Most Online Versions
Many recipes are vague — this one is optimized for success:
- Exact hydration ratio
- Proper frying temperature guidance
- Short kneading time
- Thickness control
- Batch frying strategy
- Flavor balance
Consistency is what makes recipes rank and get repeat traffic.
👪 Perfect for Families & Beginners
This is one of the best breads to cook with kids or new bakers because:
- No yeast timing
- No rise waiting
- Few ingredients
- Fast payoff
- Easy shaping
- Fun frying process
It builds confidence quickly.
💡 Flavor Upgrade Ideas
Want gourmet-style bannock?
Add after frying:
- Garlic butter brush
- Maple butter glaze
- Herb oil drizzle
- Cinnamon sugar coating
- Smoked salt sprinkle
Small finishes make big differences.
🥇 Final Thoughts — Why Bannock Bread Deserves a Spot in Your Kitchen
Canadian Bannock Bread is more than just quick bread — it’s tradition, comfort, and practicality combined. With just a few ingredients and minutes of cooking, you get golden, fluffy bread that can be sweet or savory, rustic or refined.
It’s perfect for busy days, outdoor cooking, cozy meals, and sharing with family. Once you make it, it often becomes a repeat recipe because it’s simply that reliable and satisfying.